When I decided to test Bay Photo Labs for the quality of their metal prints, I wanted something different than the regular 8x10s or 20x30s.
In addition, I wanted a theme and not just pick a few photos for the wall. I decided on 3 images with 3 different colors. After all, what’s the point of getting test prints made and all the colors are the same?
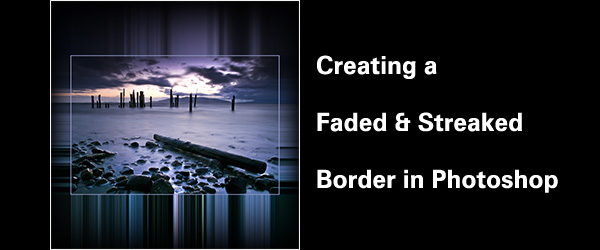
So I chose three different images to represent the three primary colors of Photography: Red, Green, and Blue. AND, I did not want the prints to be just normal prints. So as I was sitting there pondering what I wanted, I was examining the canvas prints on my wall. They have “fade to black” sides which make them appear to float off the wall. A light bulb went off over my head.

Here’s the set and the result of that inspiration:
This technique is rather easy and you can get some great looking wall prints with it.
It uses a technique called “pixel stretching” and uses the gradient tool to bade the stretched pixels to black.
It took me about half an hour to decide on the theme and final print size. I wanted square metal prints to they look better from a distance and you didn’t have to worry about trying to get the arrangement to look nice on the wall.
Square prints make this easy for two reasons: The image is relatively big and the prints are small enough to hang in a narrow wall space.
So Let’s Begin:
***To make things a bit easier, I’ve also incorporated a video after the main blog to help you better understands the steps.
First choose the image you’d like to use. Second, choose your image size. The beauty of this technique is you can make your final print a 20×30 then have the main image float as a 16×24.
For an example, I’ll use an image of the Locust Beach pilings in Bellingham, Wash., I shot a few days ago.

It’s a nice image and my wife and I want a nice print to hang on our wall. We’re thinking of a nice 20×30 canvas.
I want a nice image to float inside a 20×30. Doing some quick math, to get a 2″ faded boarder my main image should be about a 16×24.
1. Make the image a 16×24. I use 300 dpi to keep good detail in the image and a high enough resolution to make a high quality print. The 16×24 stay with the 3:2 ratio of the sensor and gives an even border.
2. Take the image and using the “Layers” panel in Photoshop, duplicate the “Background” layer twice so you have a total of three layers. To make it easier, I re-name the layers as follow: Top is called Main Image, and the middle is “Faded Border.”
3. Click on the “Background” layer to highlight it. Using the Canvas Size command, make your canvas the size you need, in this case it’s20x30, with a black background. You can choose any backround color you like. I just prefer black.
4. Highlight the upper layer and click on the “eye” to hid it. This makes it easier to work in the next few steps.
5. Highlight the middle layer. Don’t forget this part or you’ll be doing all the pixel stretching on the wrong layer. Yes, I did this a few times and it is very frustrating.
This is the “pixel stretching” tutorial:
6. Using the “Single Column” or “Single Row” marquee tool, select a pixel about halfway along the length of the side. As a note, this tool selects all the pixel in that row (horizontal) or column (vertical) and looks like a single dotted line.
7. Select the Free Transform tool. It’s under the Edit drop down menu up top, or use the “command-T” key combination. Click and hold the middle square and the drag it slightly past the edge of the canvas. Be sure to go just a touch past the edge of the canvas. Hit enter to complete the transformation.
8. Complete for all four sides.
This is the “gradient tool” fade-to-black tutorial
9. To create the fade to black, I use the Gradient Tool. The option I have is “Black to Transparent” and check the “Reverse” box in the options panel. How much you want the fade to black depends on where you start and stop the gradient tool. I keep it simple and just start at the edge of the main photo and end at the edge of the canvas. ***You can create your own gradient by clicking on the gradient pattern in the options bar. A window comes up with all the options.
10. Now, go to the layers panel and click on the eye on the Main Image layer. Make it visible.
11. On the bottom of the layers panel, or in the Layers Properties in the Layers drop-down menu (Layer > Layer Properties > Stroke), select Stroke. A panel open with all the option. You can have a thin or thick line, choose which color you would like, have the line inside, centered, or outside. Choice is yours. Play with
For the color you’d like, click on the small color box and another window opens. This is your color Picker. To pick the color you’d like from your image, use the magnifying glass. Click on it and hover over the part of the photo with the color you’d like to make your border. Click on that and then the OK button. Your border color is now chosen.
12. Your image is complete. Use the “Save As” command to save the file to keep the changes. In Fact, at the beginning of the process, I like to use the “Save As” command at the beginning and then “command-s” along the way. I save the file as a layered PSD file so I can make changes if needed.
The process only takes about 5 minutes per image.
Here are a few tips to make the workflow smoother and save time:
- Learn your menus
- Learn the quick key combinations
- Work on one photo at a time. Saves RAM and CPU time.
- Have your colors already chosen. Having a goal at what the final image will help you zero in on the final colors quicker.
- Play around with the application. Don’t be intimidated by Photoshop. Yes there is a lot to the program, but it is a powerful tool and using a powerful tool just takes a little practice.
- Be flexible. While working the image, you might decide on a completely different approach.
Below is a video of the process in action. I hope it clarifies the above steps.
title=”© Paul Conrad/Pablo Conrad Photography Storm clouds and raging surf at Locust Beach along Bellingham Bay in Bellingham, Wash.”
BTW, the metal prints from Bay Photo Lab turned out absolutely gorgeous. The colors are deep and rich, the detail is phenomenal, and mounting on the wall was super easy.
But the best way to make your images the best they can be:
- Have a goal of what your final image should look like
- Create a plan and then execute it
- Ask questions if you don’t have the knowledge.
Feel free to comment or ask questions.
Have a great day and thank you for stopping by and reading. All comments are appreciated.
Paul “pablo” Conrad


 pitches to Lynden Christian third baseman Colby Flint during the first inning on Thursday afternoon Mar. 30, 2017, at Lynden Christian High School in Lynden, Wash. Blaine defeated Lynden Christian 12 to 5. (© Paul Conrad/The Bellingham Herald)")


